WHEN TO PLANT:
For best results, plant from July through September. Early planting establishes
the new rhizomes before winter. If you live in an area with a strong winter
climate, plant at least 4-6 weeks before a hard frost. July through September is
also a good time to dig and reset clumps of iris that are crowded, usually after
3-4 years growth. If you live in an area with a harsh winter climate, your iris
may require some sort of winter protection, especially the first year. Check
with your local county agricultural agent to see what they recommend.
WHERE TO PLANT: The
ideal location is a sunny, WELL-DRAINED position. Sunshine should be at least a
half-day. Iris will grow in deep shade, but will not flower. Water should not
stand in your beds; raise beds slightly above the level of the garden paths if
necessary. Good air circulation is essential. Without it, foliage
diseases and rhizome rots thrive.
SOIL PREPARATION: This
is the most important factor in growing iris. Work the soil well to a depth of
10 to 12 inches. If your soil is heavy, incorporate sand or some other material
that will allow moisture to percolate out quickly. Addition of compost or other
organic material will greatly benefit the soil and produce better plants. Gypsum
is also an excellent soil conditioner. Have your soil tested before applying any
other corrective measure. We recommend addition of alfalfa pellets to amend the
soil.
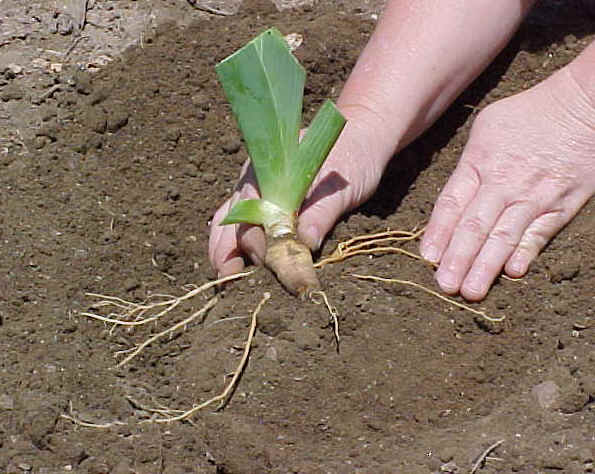
DEPTH TO PLANT: Place
your rhizomes at or just barely below the surface of the ground with the
roots spread well out underneath so the rhizome is within reach of the sun's
rays while the roots beneath are in a moist (not soggy) soil. DO NOT PLANT TOO
DEEPLY! Be sure to firm the soil tightly around each rhizome when planting. At
times of excessive heat, newly set plants can be shaded by an upright shingle or
some such protection, cutting off the direct rays of the sun for a few days.
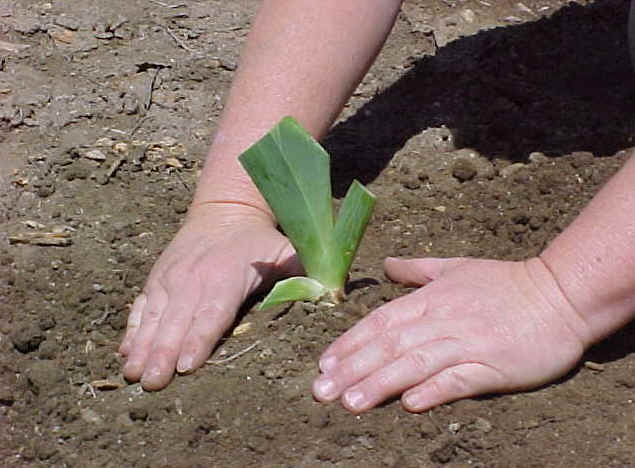
BASIC PLANTING STEPS:
Step (1) Build up a small mound of soil in the center of the planting
hole.
Step (2) Center the rhizome on the soil mound and spread out the roots on either
side.
Step (3) Firm the soil around the roots. Newly planted rhizomes should be
watered thoroughly.
Be Patient -- Irises
are perennials and require time to grow. New growth may not be noticed
until late Fall or in the Spring the next year. There may not be blooms
until yet the next Spring after initial planting.
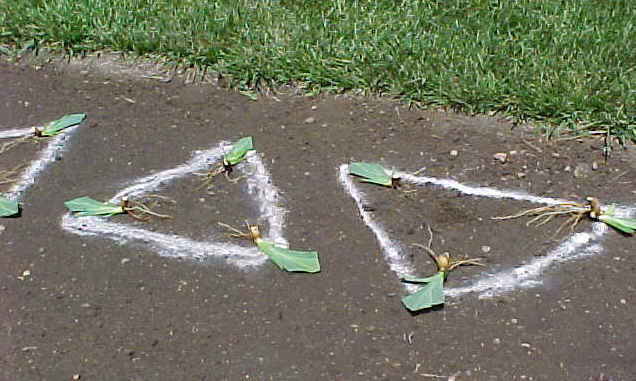
 DISTANCE APART: This
depends on your particular plans. Generally iris are planted 12 to 24 inches
apart. Closer plantings will give an immediate effect, but will need thinning
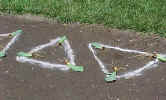
much sooner. To give an immediate clump effect, plant three rhizomes of one
variety in a triangle with the toes of the rhizomes pointing inwards about 8
inches apart. DISTANCE APART: This
depends on your particular plans. Generally iris are planted 12 to 24 inches
apart. Closer plantings will give an immediate effect, but will need thinning
much sooner. To give an immediate clump effect, plant three rhizomes of one
variety in a triangle with the toes of the rhizomes pointing inwards about 8
inches apart.
WATERING: Again,
this depends on your location. Newly set plants need moisture so they can grow a
new root system. Keep newly planted rhizomes moist, but not wet, until strong
growth is apparent. They appreciate the attention. Water at fairly long
intervals in dry weather. Established plants do not require watering except in
very arid parts of the country. The common
mistake is to give iris too much water!
FERTILIZING: Iris
will thrive without feeding but will respond to fertilization with spectacular
results. An application of a well-balanced fertilizer (5-10-5), applied as a top
dressing dusted around and in between plants in the early Spring and very late
Fall is desirable. Fertilizer can also be applied right after bloom is finished.
Any fertilizer application should be light. In general, fertilizers high in
nitrogen, including fresh manure, should be avoided because too much nitrogen
encourages rot problems.
Bone Meal as a slow release phosphate source is
recommended to be applied at planting time. Triple phosphate is more rapid
than Bone Meal and may "burn" rhizomes if too much is used at plating
time and/or if the rhizome is in direct contact with this fertilizer.
Also, when applying a Herbicide such as Weed and Feed
to an adjacent lawn with a spreader which might cast onto the iris should be
avoided. These chemicals may cause much harm to your iris plants.
BLOOM SEASON: Variety of
iris will determine the height of the bloom stalk (stem) and bloom time. Median
Bearded Irises, such as standard dwarfs, bloom as early as late March. Tall
Bearded Iris may bloom as late as June. SDBs range in height from 8 to 15
inches, where as the TBs range from 28 to over 40 inches. After the bloom is
complete, cut the bloom stalk as close to the bottom as possible. Seedpods may
appear as a result of hybridization. If is best to cut these away from the
plant. During the rest of the year, established irises require little care
except for attention to the signs of disease and the few iris pests. Keeping the
iris beds CLEAN (free of fallen leaves and weeds) is very important. Irises
suffer less from diseases and pests than most other garden plants under normal
conditions.
GENERAL GARDEN CARE: Remove limp outside foliage as
the iris grows, otherwise do not trim iris foliage if green. Brown or diseased
leaves should be cut off and removed from the garden. At all times, try to keep
all garden litter, grasses, etc. away from the rhizome. Bloom stalks (not
leaves!) should be cut off close to the ground after blooming. It is especially
important to keep the garden clean during winter and not allow dead leaves, etc.
to remain around the plants.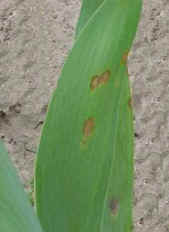
An iris garden should not be over watered, or overfed. This is an example of fungal leaf spot. It
is a major disease of iris foliage. Note the brown rims that ring the lesions.
Keep an eye out for the onset of leaf spot (bacterial or fungal which look
similar) during wet weather. Once present, bacteria spot can be treated by
cutting the infected foliage away and removing it from the garden. Fungal spot
can be treated with fungicides with moderate effectiveness. If leaf spot is a
problem, soak in fungicide for 30 minutes after rinsing in bleach water. Dust
any open wounds with sulfur. The best cure is prevention by not over watering.
Another major problem is Soft Bacterial Rot that again
can be caused by over watering. Symptoms of Soft Rot include very smelly, soft,
and mushy rhizomes. When this disease is present, the rhizome should be dug, the
infected tissue scraped away, treated with 10% bleached, and dried well before
replanting into another healthy area. These are the two most frequently
encountered problems.
|
|

|
|
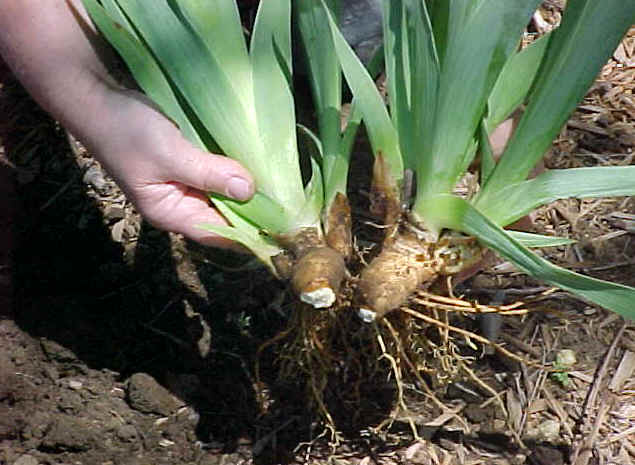
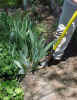
| Figure 1. Digging a
three year iris clump. |
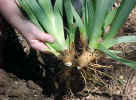
Figure 2. Remove
excess dirt and discard the old center divisions. |
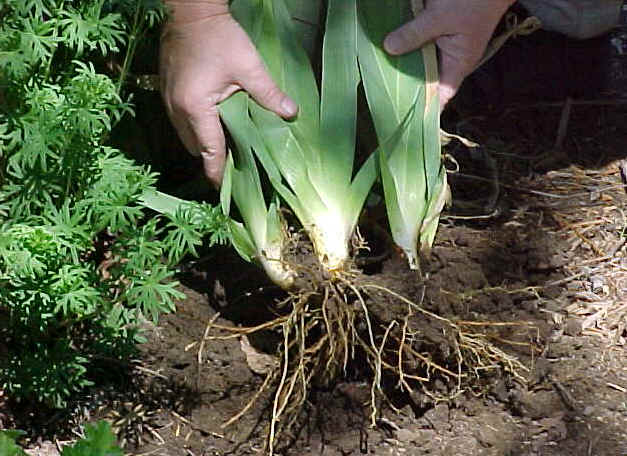
Figure 3. Separate
the individual rhizomes for replanting. |
MOVING OR THINNING YOUR IRIS:
Every 3 or 4 years, dig clumps, remove and
discard the old center divisions that have bloomed and replant the new large
fans with strong foliage. Use a sharp knife to separate rhizomes, borer holes or
diseased looking parts. Trim leaves halfway back to an inverted V shape (^) and
also trim roots back to about 4-6 inches. Soak for 1-10 minutes in 10% bleach
solution, dry in cool, shady place for a day. If leaf spot is a problem, soak in
fungicide for 30 minutes after rinsing in bleach water. Dust any open wounds
with sulfur .
This is Mr. Safford - George's Friend. He is
tilling his ground to plant iris later this year. More experienced
irisarians have tried other methods for starting bearded iris in
pots. Thanks to Glenn Simmons in Springfield, Missouri for the
contact. And thanks to Walter Moores with the North Mississippi
Lakes Iris Society in northern Mississippi for sharing his experience
with us. Click below for the information.
|

|
Back
to Top |
|